Monthly Archives: June 2019

Eavesdropping with tcpdump

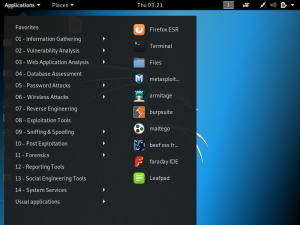
Devices such as laptops, smartphones, tablets, etc. create network traffic when they are connected to the same network. When an attacker performs packet sniffing of the network traffic, they are able to view the activity on those devices such as visited websites. TCPDump is a command-line packet analyser that allows users to intercept and view packets that are being transmitted over a network.

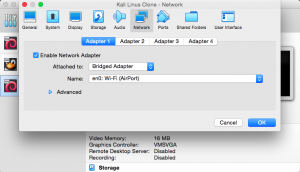
To test these tools, prepare 2 virtual machines. One will be the attacker and the other will be the victim. If Kali Linux is already installed, you can simply clone it. For both machines, click “settings” and “network”. Here, set the network to “bridged adaptor”.

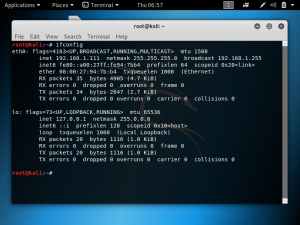
Run both machines and type the command “ifconfig” in terminal to get the IP addresses. As shown in the screenshots below, the attacker’s IP address is 192.168.1.111 and the victim’s IP address is 192.168.1.112.

In the attacker’s command line, type: tcpdump -vvn -i eth0 host 192.168.1.112 -w test.pcap. After pressing enter, try to browse various websites in the victim’s browser. As the victim browses, the attacker’s machine will eavesdrop on all the packets transmitted and received by the victim.

Footprinting

Footprinting is a technique for information gathering. In information gathering, we try to obtain as much information as possible about the target. The gathered information include:

  • Contact information
  • Configurations
  • DNS hostnames
  • IP adresses

The following are a few tools that can be used for footprinting:

1. whois

This tool can either be used as a command in terminal/commandprompt or online on whois.com. The information that can be obtained include:

  • Name servers
  • Domain status
  • Dates created and updated
  • Registrant information

The command is written as: whois <targeturl>. The screenshot below shows an example of the command: whois pentest.id. As it is shown, the website is protected by cloudflare.

2. Host

The Host command will allow us to find the hosts and IP addresses from a DNS server.

The command used is: host <targeturl>. In the example below, the command is: host pentest.id. By default, it will look up A (IPv4) record, AAAA (IPv6) record, and MX (mail) record.

3. TheHarvester

TheHarvester is a tool that can be used to obtain information such as:

  • E-mails
  • Subdomains
  • Number of hosts

The information is obtained from various public sources such as search engines and social media.

An example command is: theharvester -d microsoft.com -l 100 -b google.

The above command means that we are searching for information related to microsoft.com, limited to 100 results, and the data source is google. Aside from google we can use twitter, linkedin, facebook, bing, etc. The screenshot below shows the result:

Setting up a Virtual Machine

Before performing a penetration test, it is important to set up a virtual machine to be more secure. Two things to download are Oracle VM VirtualBox and Kali Linux. VirtualBox is a software that imitates the virtual components of a computer. Kali Linux is a Linux operating system that was developed for the purpose of penetration testing. It is highly convenient as it has over 300 penetration testing applications. Kali Linux can be downloaded here https://www.kali.org/downloads/.

The first thing to do is install VirtualBox. Once VirtualBox is installed, open the application and a screen as shown below will be shown:

Kali Linux will be installed within VirtualBox. To add a new virtual machine, click on the “new” button and you will see the screen as shown below:

Give the virtual machine a name, for example, “Kali Linux”. Set the type to “Linux” and the version to Debian (64-bit). Click “continue”. The next part is setting the amount of RAM that will be allocated to the virtual machine. Half of your computer’s total RAM is sufficient. After clicking “continue”, select the option “Create a virtual hard disc now”. Click “create”.

The next part is to choose between dynamically allocated storage or fixed storage. Once this is done, set the amount of storage to be allocated. This depends on how much free storage is available in your computer. Click “create”.

In the main page, the virtual machine you just created will be among the list of machines.

Select the virtual machine and click the “start” button and you will see the screen as shown below. There is still no virtual optical disk file selected, so search for the Kali Linux disk that you have downloaded in the beginning.

Once the disk is selected, your virtual machine will start and there will be options to set up Kali Linux. When you see the screen as shown below, select “graphical install”.

Following this will be selecting language, location, locales, keyboard, timezone, etc. Kali already has a Root User named “root” and the password is “toor”. It is recommended that you change this password.

Once you are logged in, you will see the screen as shown below:

As you navigate to the “application” dropdown, you will see the available tools.